| АВТОСТЕКЛА: продажа автостекол, доставка и установка автостекол в Москве |
в мире автостекол
| Email для связи: |

НОВЫЕ ПОСТУПЛЕНИЯ Новый датчик влажности для некоторых моделей Hyundai/Kia 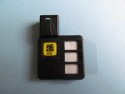
2 400 руб.
СПЕЦ. ПРЕДЛОЖЕНИЕ Стекло кузовное правой стороны для Mitsubishi Shariot Grandis wagon 03г- (без молдинга) 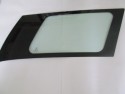
960 руб.
А ЗНАЕТЕ ЛИ ВЫ, ЧТО... Полимер для заделывания сколов и трещин при температуре +5 градусов по Цельсию безвозвратно теряет свои основные свойства и становится не пригодным.
|
2009 Audi A3Windshield and back glass removal and replacement instruction. 2009 Audi A3.  Vehicle type: Four-door hatchback.
NAGS numbers*: Windshield part numbers FW2579 solar, bonded top molding and FW2580 solar, rain sensor, bonded top molding and bracket; back glass FB22687 solar, heated, GPS antenna. Helpful tools or supplies: Cutout wire; high modulus urethane adhesive. Watch for: The top edge of the windshield is exposed and close to the vehicle body. The entire back glass is exposed as well. Take care to avoid damage during removal. *With permission from National Auto Glass Specifications. Call NAGS at 800/551-4012 or visit http://glass.mitchell.com/. A. Windshield.
Preparation. 1. Cover the front seats, floorboards, dash and steering wheel with a clean drop cloth or disposable plastic covers. Note: Always wear eye and hand protection when working with glass. Make sure you have the right glass and moldings and that the urethane systems you are about to use are current. Windshield part numbers are FW2579 and FW2580. 2. Drape the fender with a fender cover and tape up any vulnerable areas on the vehicle to protect against possible damage. Tape up the defroster vents to prevent debris from falling into the openings. 3. To remove the rearview mirror, grasp the base and turn to the right. 4. If the vehicle is equipped with a rain sensor, remove the sensor by first removing the two-piece decorative cover. Release the retaining clip and remove the sensor from the glass.
 5. Remove the windshield-wiper nut covers. 6. Remove the windshield-wiper nuts using a 13-millimeter wrench or socket. Move the wiper arm in an up-and-down motion to break it loose from the post, or use a wiper-puller. Caution: Wipers can sometimes be hard to remove. To avoid stressing the post, use a wiper-puller. 7. Lift the hood bulb seal. 8. Remove the glass edge of the cowl panel by prying it out from the lower retainer bonded to the glass. Disconnect the washer hoses, remove the panel and set it in a safe place.
 9. The side moldings are pushed into a retainer attached to the A-pillar with double-sided tape. To remove, carefully pry the lower edge of the molding upward and continue up the side. 10. The top edge of the windshield is exposed and close to the wall of the pinchweld. Take care to avoid damaging the vehicle body during removal. Note: Before beginning windshield removal, verify the new windshield is the correct one and the urethanes and primers are current. Never use outdated products as this could jeopardize the structural integrity of the vehicle and the safety of its passengers. Removal. 12. Before cutting out the windshield, remove contaminants from the glass and pinchweld to prevent contact with the urethane. 13. Use the cutting tools of your choice to remove the glass from the adhesive bead. Note: You may need to use cutout wire along the top edge of the windshield. If you use a power tool, however, lubricate the cutting area with water. Spray the top and sides; then make your cuts. There are no gravity stops on this glass. 14. Take the windshield out of the opening using vacuum cups. Make sure the vacuum cups do not overlap a crack in the glass. Lift the glass and place it on a windshield stand or suitable workstation. Installation 16. Dry fit the new glass to the opening. Mark your glass using a grease pencil or retention molding tape. 17. Place your vacuum cups on the new windshield in the appropriate location. 18. Set the windshield onto the old urethane. 19. With the windshield resting in the opening, make sure it is in the right spot. 20. Adjust both sides to the correct setting, marking the passenger side, then the driver side. Lift the glass and place it on a windshield stand or suitable workstation. 21. Follow the urethane manufacturer’s recommendations for installation. Note, this vehicle requires the use of high modulus adhesives to restore structural integrity and performance characteristics. 22. Clean the inside of the windshield using a urethane manufacturer recommended product. Do not touch the bonding area of the windshield after cleaning, prepping or priming it. 23. Wear powder-free Nitrile gloves to protect against harsh chemicals. 24. Apply the glass prep and primer following the urethane manufacturer’s recommendations. 25. Using the tool of your choice, remove the original urethane bead, leaving 1 mm-2 mm of existing urethane on the pinchweld. Make sure there are no contaminants and do not touch the pinchweld after prepping the area. 26. Apply the pinchweld primer only to the areas where needed and follow the urethane manufacturer’s recommendations. Allow preps and primers to dry as recommended by the urethane manufacturer. 27. Apply a triangular bead of urethane to the same path as the freshly cut urethane on the pinchweld. Before cutting your V-notch, cut the tip off of your nozzle with a nozzle-cutter. With the cut nozzle, measure to the top of the roofline, and at 1/16-inch higher than the roofline, make a mark on the nozzle with a pen or marker. Notch the nozzle up to the marked line; this will give you the appropriate triangular bead. 28. Lift the windshield from the windshield stand or workstation using vacuum cups. Set the windshield on the urethane at the mark you made during dry fit. Lower the driver’s side of the windshield onto the urethane and line it up with the dry-fit mark; it is now in place. 29. The windshield is now ready to be decked. Press firmly to ensure a good seal. 30. Before re-installing the parts, check for leaks. Use a leak detector to go over the perimeter of the windshield. If you find a leak, apply more pressure or add more urethane to the spot and ensure that the glass makes contact with the wet urethane. 31. Re-install the removed parts in reverse order. 32. Allow the urethane to cure according to the urethane manufacturer’s recommended cure time before returning the vehicle to the customer. Warning: Disregarding the safe drive-away time that your urethane manufacturer recommends could jeopardize the structural integrity of the vehicle and the safety of its passengers. 33. You have completed the removal and replacement of the windshield. B. Back glass. 2. Remove the interior garnish moldings and disconnect the defroster and antenna connectors. 3. Remove the wiper cap from the rear wiper. Carefully remove the nut and washer nozzle from the base of the wiper using an open-end or adjustable wrench.

5. Remove the wiper from the wiper post and set aside. 6. Cut out the back glass carefully to avoid damaging the wall and exposed floor of the pinchweld. Installation. 8. Dry fit the new glass to the opening. Mark your glass using a grease pencil or retention molding tape. 9. Place your vacuum cups on the new back glass in the appropriate location. 10. Set the glass onto the old urethane. 11. With the back glass resting in the opening, make sure it is in the right spot. 12. Adjust both sides to the correct setting, marking the passenger side, then the driver side. Lift the glass and place it on a windshield stand or suitable workstation. 13. Follow the urethane manufacturer’s recommendations for installation. 14. Clean the inside of the back glass using a urethane manufacturer recommended product. Do not touch the bonding area of the back glass after cleaning, prepping or priming it. 15. Wear powder-free Nitrile gloves to keep off chemicals. 16. Apply the glass prep and primer following the urethane manufacturer’s recommendations. 17. Using a pinchweld scraper, remove as much of the original urethane as the urethane manufacturer recommends. Be careful not to damage the floor or wall of the pinchweld. Before removing the old urethane, make sure there are no contaminants and do not touch the pinchweld after prepping the area. 18. Apply the pinchweld primer only to the areas where it is needed, taking care to avoid the visible areas on the wall of the pinchweld. Allow preps and primers to dry as recommended by the urethane manufacturer. 19. Apply a triangular bead of urethane to the same path as the freshly cut urethane on the pinchweld. Before cutting your V-notch, cut the tip off of your nozzle with a nozzle-cutter. With the cut nozzle, measure to the top of the roofline, and at 1/16-inch higher than the roofline and bodyline, make a mark on the nozzle with a pen or marker. Notch the nozzle up to the marked line; this will give you the appropriate triangular bead. 20. Place your vacuum cups on the back glass in the appropriate location. 21. Set the back glass in the opening using the wiper post as a guide. 22. The back glass is now ready to be decked. Press firmly to ensure a good seal. 23. Before re-installing the parts, check for leaks. Use a leak detector to go around the perimeter of the back glass. If you find a leak, apply more pressure to the spot and ensure that the glass makes contact with the wet urethane. 24. Re-install the removed parts in reverse manner. 25. Check for proper operation of the wiper and washers. 26. Allow the urethane to cure according to the urethane manufacturer’s recommended cure time before returning the vehicle to the customer. 27. You have completed the removal and replacement of the back glass. By Bob Beranek.
© 2009 National Glass Association. |