| АВТОСТЕКЛА: продажа автостекол, доставка и установка автостекол в Москве |
в мире автостекол
| Email для связи: |

НОВЫЕ ПОСТУПЛЕНИЯ Стеклодомкрат/подъемник одинарный на присоске "mini" 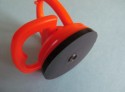
384 руб.
СПЕЦ. ПРЕДЛОЖЕНИЕ Скотч прозрачный на акриловой основе (55х55х1.0мм) для крепления видеорегистратора, радар-детектора, навигатора, дополнительных зеркал 
180 руб.
А ЗНАЕТЕ ЛИ ВЫ, ЧТО... Листовое стекло было изобретено в 1917 году в Америке Colburn, благодаря чему на свет появилась известная марка автостекол LOF Libbey-Owens-Ford.
|
Honda Pilot 20102010 Honda Pilot.  Vehicle type: Four-door utility vehicle
NAGS numbers*: Windshield part numbers FW2925 solar and FW2926 acoustic interlayer, electrochromatic mirror, solar; back glass part number FB23794 heated, solar, one hole. Helpful tools or supplies: It is recommended technicians acquire replacement moldings and clips before beginning work on this vehicle. Also note, this vehicle does not have gravity stops. If one technician is setting the glass, have temporary stops on hand. Watch for: Failure to use a replacement windshield with an acoustic interlayer might result in vehicle performance issues, as the interlayer might be required to allow for voice activation devices. Also note, the two rubber ends of the cowl panel wrap around the hood hinges and can be damaged if care is not taken. *With permission from National Auto Glass Specifications. Call NAGS at 800/551-4012 or visit http://glass.mitchell.com/. Windshield 2. Drape the fender with a fender cover and tape up any vulnerable areas on the vehicle to protect against possible damage. Tape up the defroster vents to prevent debris from falling into the openings. 3. Remove the rearview mirror using a T20 Torx screwdriver. 4. Remove the windshield-wiper nut covers. 5. Remove the windshield-wiper nuts using a 17-millimeter wrench or socket. Move the wiper arm in an up-and-down motion to break it loose from the post, or use a wiper puller. Caution: Wipers can sometimes be hard to remove. To avoid stressing the post, use a wiper puller. 6. Remove the three push-down center retainers from the cowl panel’s leading edge. Pull the panel upwards and out from under the lower glass edge. Set the panel in a safe place. Caution: The two rubber ends of the cowl panel wrap around the hood hinges and can be damaged if care is not taken.
7. Remove the side moldings using a door-pad tool or plastic stick to pry upwards. The side moldings have a two-clip system. The male clips can be broken easily, so have replacement clips on hand. The female clip is glued to the wall of the A pillar, and if peeled free, might require double-sided tape to re-attach. 8. Peel the top molding off of the glass edge; it may require replacement. Note: Before beginning windshield removal, verify the new windshield is the correct one and the urethanes and primers are current. Never use outdated products as this could jeopardize the structural integrity of the vehicle and the safety of its passengers. Removal 10. Before cutting out the windshield, remove contaminants from the glass and pinchweld to prevent contact with the urethane. 11. This vehicle does not have gravity stops. Use temporary stops if one technician is setting the glass. Before cutting out the glass, install a temporary gravity stop at the bottom edge. 12. Use the cutting tool of your choice to remove the glass from the adhesive bead. Note: When using any power tool, lubricate the cutting area with water. Spray the top and sides; then make your cuts. 13. After cutting the sides and top, cut out the bottom portion of the glass. Spray the bottom of the windshield with water at least 4-to-5 inches above the urethane on the glass, so the water flows down into the urethane while you make your final cut across the bottom of the windshield. Caution: Never use your head to push, as this could result in back and neck injuries. 14. Take the windshield out of the opening using a set of vacuum cups. Make sure the vacuum cups do not overlap a crack in the glass. Lift the glass and place it on a windshield stand or suitable workstation. Installation 16. Dry fit the new glass to the opening. Mark your glass using a grease pencil or molding-retention tape. 17. Place your vacuum cups on the windshield in the appropriate location. 18. Set the windshield onto the old urethane. 19. With the windshield resting in the opening, make sure it is in the right spot. 20. Adjust both sides to the correct setting, marking the passenger’s side, then the driver’s side. Lift the glass and place it on a windshield stand or suitable workstation. 21. Follow the urethane manufacturer’s recommendations for installation. 22. Clean the inside of the windshield using a urethane manufacturer-recommended product. Do not touch the bonding area of the windshield after cleaning, prepping or priming it. 23. Wear powder-free Nitrile gloves to keep off chemicals. 24. Attach the upper molding to the glass edge. 25. Apply the glass prep and primer following the urethane manufacturer’s recommendations. 26. Using the tool of your choice, remove the original urethane bead, leaving 1-2 millimeters of existing urethane on the pinchweld. Make sure there are no contaminants and do not touch the pinchweld after you have prepped the area. 27. Apply the pinchweld primer only to the areas where needed, and follow the urethane manufacturer’s recommendations. Allow preps and primers to dry as recommended by the urethane manufacturer. 28. Apply a triangular bead of urethane to the same path as the freshly cut urethane on the pinchweld. Before cutting your V-notch, cut the tip off of your nozzle with a nozzle-cutter. With the cut nozzle, measure to the top of the roofline, and at 1/16-inch higher than the roofline, make a mark on the nozzle with a pen or marker. Notch the nozzle up to the marked line; this will give you the appropriate triangular bead. 29. Lift the windshield from the windshield stand or workstation using vacuum cups. Set the windshield on the urethane at the mark you made during your dry fit. Lower the driver’s side of the windshield onto the urethane and line it up with the dry-fit mark; it is now in place. 30. Press firmly to ensure a good seal. 31. Before re-installing the parts, check for leaks. Use a leak detector to go over the perimeter of the windshield. If you find a leak, apply pressure or add more urethane to the spot and ensure that the glass makes contact with the wet urethane. 32. Re-install the removed parts in reverse order. 33. Allow the urethane to cure according to the urethane manufacturer’s recommended cure time before returning the vehicle to the customer. Warning: Disregarding the safe drive-away time that your urethane manufacturer recommends could jeopardize the structural integrity of the vehicle and the safety of its passengers. 34. You have completed the removal and replacement of the windshield. B. Back glass 2. First, remove the decorative defroster wiring caps and disconnect the wiring leads from the window tabs. 3. Remove the window latch from the glass using a T30 Torx screwdriver to remove the two screws. If the glass is broken, this might have been lost. Have a replacement handy. 4. Remove the piston clips from the top piston connector and pull the piston rod from the glass-mounted pivot ball. 5. Remove the T30 Torx screws from the two top-mounted hinges. If you are removing the back glass by yourself, tape the hinge to the glass while you remove the other side from the vehicle. Installation 7. Start attaching the glass to the vehicle by first attaching the top hinges. 8. Attach the piston rods. 9. Attach the wiring harnesses. 10. Check operation of the back glass by opening and closing it several times to make sure it is working properly. 11. Check the operation of the defroster. 12. You have completed the removal and replacement of the back glass. By Bob Beranek |